Give us a call
920-423-3309
Email us
info@fuelmotousa.com

Fuel Moto is proud to carry the Power Vision fuel tuner by Dynojet, a true evolution in tuning for any fuel injected Harley-Davidson motorcycle equipped with a Delphi ECM. Included with every Power Vision is a high resolution color touch screen flash device which incorporates basic auto tuning functionality, a vehicle interface cable and a USB interface cable to communicate with the WinPV Windows PC based tuning application.
Power Vision also includes comprehensive tuning software for your computer including an integrated tuning utility called Auto Tune Basic which uses the stock narrowband sensors, and there is the awesome optional Auto Tune Pro kit which uses the AT-110/AT-120 with dual Bosch Wideband sensors. Auto Tune Basic and Pro allow you to Auto Tune your bike right on the Power Vision display. Fuel Moto will pre-program your Power Vision for your specfic modifications and we offer industry leading product and tuning support for our customers. We have more experience with Power Vision than anyone, anywhere, period.
Fuel Moto also has a wide range of Power Vision calibrations we have developed in house available for many applications including the newest models, we will pre-program your Power Vision for your motorcycle and the specific performance modifications you have made. For more info we would welcome your call at 920-423-3309.
Fuel Moto is a technical partner with Dynojet and we offer unlimited technical support for Power Vision for our customers. Our direct partnership with Dynojet has allowed us to be involved with Power Vision engineering thru all stages of product development as a technical partner and there are so many never before seen features we do not know where to start. We wanted to provide the most comprehensive tuning package available, along with an easy to use package. One of the most unique features is the ability to capture your base calibration and immediately start tuning. With Power Vision you can quickly read the calibration in your ECM, retrieve it, and then edit any table within the calibration as required. You can also choose from the database of pre configured calibrations that are fully updatable thru the update client. There are hundreds of maps developed, and at the moment both Dynojet and Fuel Moto are working on more calibrations every day. The other unique feature is Power Vision's ability to not only flash the ECM without a computer, the powerful PV device allows you to edit many parameters of the tune right with the the device. It puts true tunability at your fingertips. Contact us for more info at 920-423-3309
For technical info, FAQ's, & how-to documentation visit the Fuel Moto University site
![]()
Autotune for Power Vision is a built-in feature inside the device itself that is free of charge. Autotune gives you the capability to perform closed-loop tuning of the Power Vision so you can further enhance your motorcycle’s calibration. Power Vision is a ECM flash tuning device, so the adjustments are calculated real-time in the Power Vision, this allows you to review the changes and either accept or ignore them, before flashing the updated tune to the bike’s ECM. There are two versions of Autotune for the Power Vision – Basic and Pro.
Auto Tune Basic: Works with all 2006-current models equipped with factory oxygen sensors. This is included for FREE with the Power Vision. It utilizes the stock narrow-band oxygen sensors that come equipped on the motorcycle. With a few simple clicks of the Power Vision’s touch-screen, you can perform real-time data-logging and calibration to your Power Vision.
Auto Tune Pro: Works with all 2001-2006 Delphi equipped H-D models. Requires the purchase of the Auto Tune Pro accessory kit. It includes a control module, two wide-band oxygen sensors, cables, and everything needed for installation.
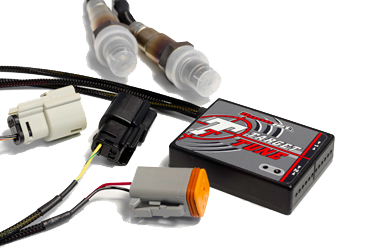
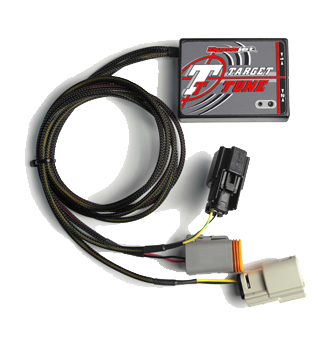
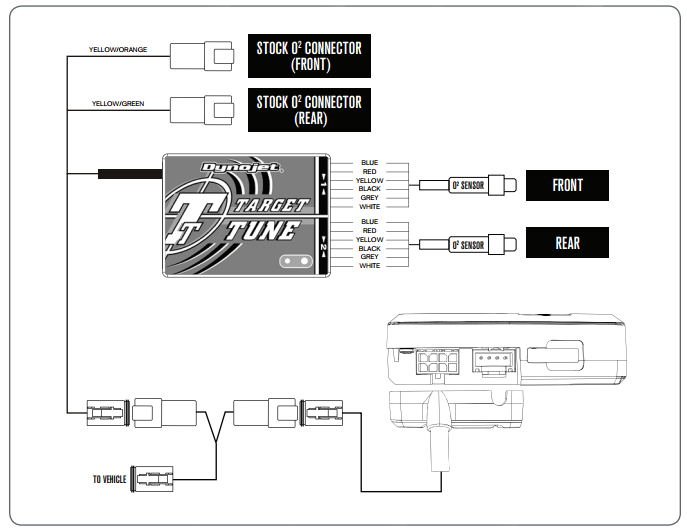
Dynojet Target Tune is an optional accessory for Power Vision that adds a new dimension to Harley tuning. Target Tune incorporates closed loop fuel control utilizing Bosch wideband O2 sensors into the HD-Delphi ECM. Dynojet has evolved the OEM closed loop parameters and adaptive fuel control within the ECM to meet the needs of performance & tuning enthusiasts alike.
* Requires Power Vision Target Tune specific calibration
** ECM must be "closed loop capable" and have OEM wiring for O2 sensor circuitry
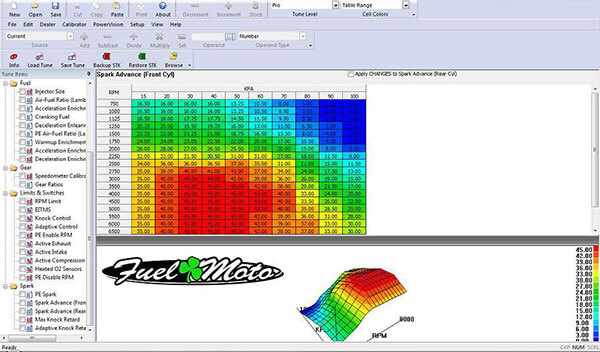
If you are an experienced tuner looking for the latest technology. The Power Vision Suite includes a highly flexible tuning / data logging device, as well as a powerful tuning application (WinPV) that’s user friendly compared to other products on the market.
Tuning parameters laid out in a clear, concise manner utilizing a “tree view structure”. It displays 6 major tuning areas.
The value file feature gives you the ability to save individual, or multiple parameters of the calibration as a file. For example, let's say you have certain AFR values that you always use, or even spark tables. You can simply save these values once, and then import them into different calibrations in the future. This highly flexible feature saves hours of tuning time.